Free Phone Call To USA

Free phone call ... link တခုပါ.. မိမိကြန္ပ်ဳတာကေန အေကာင့္လုပ္ၿပီး.. အေမရိကား ကုိ ဖရီး
ေခၚနုိင္တဲ့.. နည္းပညာတခုပါ... အားလုံး စမ္းသပ္သုံးနုိင္ေအာင္ တင္ေပးလုိက္ပါတယ္။ တခ်ိဴ႕သိ
ေနတဲ့ သူေတြ အတြက္ေတာ့မလုိေပမဲ့မသိေသးေသါသူမ်ားအတြက္ ရည္ရြယ္ၿပီးတင္ေပးလုိက္တာပါ


ဒီလင္႔ခ္ကေန သြားရပါမယ္.


အဆင့္ဆင့္ အေကာင့္တခုရေအာင္၀င္လုပ္သြားရပါမယ္။
၁။ အေပၚက ပုံမွာျပထားသလုိ Sign Up ကုိ ကလစ္ေပးပါ။
၂။ လုိအပ္တဲ့ ... First name... Last Name ေတြကုိ ေပးခ်င္သလုိ သင့္ေတာ္ရာေပးလုိက္ပါ။
Continue ကုိ ဆက္သြားပါ။
၃။ ေနာက္အဆင့္မွာ ... မိမိ Email တခုခု ကိုျဖည့္ေပးလုိက္ပါ... ၿပီးရင္..
Please select your interests မွာ နွစ္သက္ရာ ၂ ခုကုိေရြးၿပီး Tick ( အမွန္လဏၡာ )ေလး
လုပ္ေပးလုိက္ပါ။
၄။ ေနာက္အဆင့္မွာ Please verify ဆုိတာကုိ ခဏဖတ္ေပးၿပီး ( ဖတ္ခ်င္လဲဖတ္ မဖတ္ခ်င္လဲ
ရပါသည္ ) ၿပီး.... ေအာက္က I have read and agree to the above written term of
service ေဘးမွာ.. အမွန္ေလးျခစ္ေပးပါ.. ( Tick )
Continue ကုိ ဆက္ကလစ္သြားေပးပါ။
၅။ ဒီအဆင့္မွာ သူျဖည့္ခုိင္းထားတဲ့.. ကုတ္ ( code ) ကုိျဖည့္ေပးလုိက္ပါ။ Continue ကုိ ဆက္
ကလစ္သြားပါ။
က်န္တာကေတာ့လြယ္သြားပါၿပီးလုိအပ္တာကုိ ဆက္လုပ္သြားရင္း ေနာက္ဆုံး.. အဆင့္ကေန..
အစေနရာကုိျပန္ေရာက္သြားပါမယ္။
အဲမွာ မိမိ အရင္ေပးထားတဲ့ အီးေမလ္း အေကာင့္ ကုိျဖည့္.. စကား၀ွက္ထည့္ၿပီး လုိအပ္သလုိ
ဆက္သြားၿပီးေခၚဆုိနုိင္ပါၿပီး။

ဒါေလးက ကုိယ္တုိင္ ကြန္ပ်ဴတာ သုံးေနရင္း သူငယ္ခ်င္း ေတြရွိတဲ့ အေမရိက ကုိ ဖရီးေခၚဆုိနိုင္
ပါတယ္....
မွတ္ခ်က္၊ ။ကၽြန္ေတာ္ေတာ႔ မဆက္ဖူးပါ :P
စမ္းၾကည္႔ပါခင္ဗ်ာ...
Original posted by ကိုေစတမာန္

Power ISO 4.5


Create, edit, extract, convert, compress, encrypt, mount CD image file!!!
PowerISO is a powerful image processing and file compression tool, which allows you to create, extract, compress, edit and convert ISO/BIN image files, and mount these files with internal virtual drive. And most of all, the compressed files can be used directly without decompressing.

Main Features:

- Support almost all CD/DVD-ROM image file formats (ISO, BIN, NRG, IMG, DAA and so on).


Uncategory

My Uncategory are
တစ္ခါက.....မိုး

တစ္ခါက........မိုး

ကၽြန္ေတာ္႔ ဘေလာခ္႔ေလးဟာ နည္းပညာကို ရည္ရြယ္ၿပီး တည္ေဆာက္ခဲ႔တဲ႔ ဘေလာခ္႔တစ္ခုၿဖစ္ပါသည္။ကၽြန္တာ္သိသေလာက္အား မွ်ေ၀ယံုသာၿဖစ္ပါသည္။ကၽြန္ေတာ္ မေတာ္ပါခင္ဗ်ာ။သို႔ေသာ္ တစ္စံုတစ္ေယာက္က ကၽြန္ေတာ္႔ ဘေလာခ္႔ေလးကို အလည္ေရာက္လာၿပီး တစ္ခုခုဖတ္ မသြားခဲ႔ လွ်င္ ကၽြန္ေတာ္ ၀မ္းနည္းရပါမည္။သို႔ၿဖစ္ပါေသာေၾကာင္႔ စာဖတ္သူ တစ္ဦးဦး အတြက္.မပ်င္းရိေစရန္ ကၽြန္ေတာ္ နည္းပညာ မဟုတ္ေသာ ကၽြန္ေတာ္၏ စိတ္ကူးယဥ္၀ထၳဳတိုေလးမ်ားအား ေရးသားရန္ဆံုးၿဖတ္ခဲ႔ပါသည္။
ကၽြန္ေတာ္၏ ဘေလာခ္႔ webpage တစ္ခုသည္ ကၽြန္ေတာ္၏ ခံစားခ်က္မ်ား ေရးသားရန္ေနရာမဟုတ္ပါေသာေၾကာင္႔ ကၽြန္ေတာ္ ၏ Personal feel မ်ားအား ေရးသားမည္ မဟုတ္ပါခင္ဗ်ာ..Personal Feel မ်ားကို ေရးသားၿခင္းသည္ စာဖတ္သူ၏ စိတ္၀င္စားမူ႔အား ေလ်ာ႔နည္းေစလိမ္႔မည္ဟု ကၽြန္ေတာ္ယူဆပါသည္။
ကၽြန္ေတာ္႔ စိ္တ္ကူယဥ္ ၀ထၳဳေလးမ်ားရဲ႔ ပထမဆံုး၀ထၳဳသည္..........

တစ္ခါတုန္းက.......မိုး


သိပ္ မၾကာခင္ အခ်ိန္ေလးအတြင္းမွာ သူအရမ္းခ်စ္တဲ႔ ေဆာင္းရာသီကို

ေရာက္လာေတာ႔မယ္ေလ..........
ဒီခ်ိန္ဆို.....သူတစ္ေယာက္ ေကာ္ဖီ ပူပူေလးတစ္ခြက္ကို

ေသာက္ေနေလမလား.....ဒါမွမဟုတ္ ကၽြန္ေတာ္႔လို အိပ္ရာကမထေသးပဲ အလြမ္းေတြ

တနင္႔တပိုးနဲ႔ အေတြးနယ္ခ်ဲ႔ေနေလမလယးဆိုတာ ကၽြန္ေတာ္လဲ

အတိအက်မသိပါခင္ဗ်ာ............
..................................................

မိုးက ကၽြန္ေတာ္႔အတြက္ ကဗ်ာေတြကို ဖန္တီးေပးခဲ႔တယ္........
ကၽြန္ေတာ္ဟာ အရမ္းအပ်င္းထူတဲ႔ေကာင္ေလးတစ္ေယာက္ေပါ႔....အတန္းထဲမွာ

အၿမဲတမ္း ေနာက္က်လို႔ ဆရာမ ဆူခံရရင္လဲ

ထိပ္ဆံုးကေပါ႔...............ကၽြန္ေတာ္ဟာ ဦးထုပ္တစ္လံုးကို ခပ္ငိုက္ငိုက္

ေဆာင္းပီးေနတတဲ႔ ေကာင္ေလးတစ္ေယာက္ပါ.............မိုးရြာရင္ ထီးတစ္ေခ်ာင္း

အသည္းအသန္လိုက္ဌား ရတာဟာ ကၽြန္ေတာ္႔တာ၀န္တစ္ခုအလား..........

........................................................................
ဒီေန႔..........
ေက်ာင္းကို အလာ လမ္းတစ္၀က္မွာ...

ေ၀ါ.....ေ၀ါ....
ေ၀ါခနဲ ရြာခ်လိုက္တဲ႔ မိုးေၾကာင္႔ ဒီေန႔လဲ ေက်ာင္းေနာက္က်ပီဆိုတဲ႔အသိနဲ႔

ဘာလုပ္ရမွန္းမသိၿဖစ္သြားတယ္.......
"ဟူး...ေက်ာင္းေနာက္က်ပီထင္ပါရဲ႔...................ဘာလုပ္ရရင္ေကာင္းမလဲ"
"'ဒီေန႔ေတာ႔ ေက်ာင္းပ်က္လို႔က မၿဖစ္ဘူး..........မလြယ္ပါလား......"
ဒီေန႔ ကၽြန္ေတာ္ ေနာက္က်လို႔ မၿဖစ္ပါ.....အတန္းမွာ ဆရာမက Tutorial

ေၿဖမယ္လို႔ေၿပာလို႔ပါ....ေၿဖလဲ ေအာင္မွာမဟုတ္ေပမဲ႔ ဆရာမကို အားနာလို႔ ကၽြန္ေတာ္

ေက်ာင္းတက္ဖို႔ ဆံုးၿဖတ္ထားခဲ႔တာပါ.......
ဘာပဲၿဖစ္ၿဖစ္ သြားဖို႔ ကၽြန္ေတာ္ ဆံုးၿဖတ္လိုက္တယ္...........
........................................................................................

အတန္းခ်ိန္ေရာက္ဖို႔ ၃၀မိနစ္ခန္႔ေတာ႔လိုပါေသးတယ္....
ဒါနဲ႔ ကၽြန္ေတာ္လဲ မိုးလံုမဲ႔တစ္ေနရာရာကို သြားဖို႔ ဆံုးၿဖတ္လိုက္ပါတယ္..........

မလွမ္းမကမ္းမွာ လက္ဖက္ရည္ဆိုင္ေလးတစ္ဆိုင္ကို ကၽြန္ေတာ္ ေတြ႔လိုက္ရတယ္...
"ေဟာ..........ေတြ႔ပီ"လို႔ တစ္ကိုယ္တည္းေရရြတ္ပီး ဆိုင္ထဲကို ကၽြန္ေတာ္

ေၿပး၀င္ခဲ႔တယ္.....ဆိုင္ပိုင္ရွင္ၿဖစ္ဟန္တူတဲ႔ အသက္ ၅၀ခန္႔ဦးၾကီးက ကၽြန္ေတာ္႔ကို

ၾကည္႔ပီး သနားေနတယ္နဲ႔ တူပါရဲ႔...........................

...........................................................................
ကၽြန္ေတာ္ ေကာ္ဖီတစ္ခြက္နဲ႔ Loddon ေဆးလိပ္ကိုမွာၿပီး ေအးေဆးစြာ

မိုးခိုေနခဲ႔ပါတယ္................
ရုတ္တရတ္....................

ကၽြန္ေတာ္ေတြ႔လိုက္ရတယ္....................
.............................................................................
ရုတ္တရတ္..........
ကၽြန္ေတာ္႔ ၿမင္ကြင္းေရွ႔မွာ...........
မိန္းကေလးတစ္ေယာက္လို႔ ထင္ရတဲ႔ လူတစ္ေယာက္ မိုးခိုဖို႔

ကၽြန္ေတာ္႔စီေၿပးလာဟန္ တူပါရဲ႔.....သူ႔ပံုစံက အေလာတၾကီး ၿဖစ္ေနပံုပါပဲ...............

ေဟာ.........အဲဒီလူ ကၽြန္ေတာ္႔ၿမင္ကြင္းထဲမွာ တစ္ၿဖည္းၿဖည္း နီးလာပါပီ.........
..........................................................................................................

အနီေရာင္၀မ္းဆက္နဲ႔ ေကာင္မေလးတစ္ေယာက္............................
အရမ္းလွလို႔ ကၽြန္ေတာ္ သူ႔ကို

ေငးၾကည္႔ေနမိပါတယ္.......................စိတ္ထဲကေတာ႔ ဘာရာယ္မဟုတ္ပါဘူး........
ၿပီးေတာ႔......သူ ကၽြန္ေတာ္နဲ႔ မလွမ္းမတမ္း စားပြဲေလးမွာ လာထိုင္ပါတယ္...........
..................................................................
သူ႔ေခါင္းက ဆံပင္ေတြကို သူလက္နဲ႔ခါေနတယ္.......၅မိနစ္ခန္႔မွာ သူ ဆိုင္ရွင္

ဦးၾကီးစီကို ေကာ္ဖီတစ္ခြက္ မွာပီးေသာက္ပါတယ္.............
ဒီအထိ ကၽြန္ေတာ္ အဲဒီေကာင္မေလးကို လိုက္ၾကည္႔ေနတုန္းပါပဲ.................
..........................................................................................................
ကၽြန္ေတာ္ စီးကရတ္ တစ္လိပ္ကုန္သြားတယ္.........
လက္က နာရီကို ၾကည္ပမိပါတယ္......
"ေက်ာင္းခ်ိန္ေတာင္နီးေနပါေရာလား........မၿဖစ္ေသးပါဘူးေလ ....သြားမွပဲ" ဆိုၿပီး

ဆိုင္ရွင္ ဦးၾကီးစီကို ပိုက္ဆံရွင္ဖို႔ ကၽြန္ေတာ္ထြက္လာခဲ႔တယ္....
ေဟာ...ေတြ႔ၿပန္ပါပီ....
ေစာေစာ ကေကာင္မေလး.........
ဒါေပမဲ႔ ကၽြန္ေတာ္ ဒီတစ္ခါေတာ႔ အဲဒီေကာင္မေလးကို ဂရုမစိုက္ႏိုင္ေတာ႔ပါဘူး......
ဘာလို႔လဲဆို ေက်ာင္းခ်ိန္အတြက္ပဲ ကၽြန္ေတာ္ အာရံုေရာက္ေနခဲ႔လို႔ပါ.......
ေသခ်ာတာတစ္ခုကေတာ႔.......................
ပ်ာယိပ်ာယာ ၿဖစ္ေနတဲ႔ အဲဒီေကာင္မေလးဟာ အရမ္းခ်စ္ဖို႔ေကာင္းေနမွာ

အမွန္ပါပဲ...

..................................................................................
ကၽြန္ေတာ္......ဒီတိုင္းသြားရင္ မိုးေတြေသခ်ာေပါက္ရြဲေတာ႔မယ္ဆိုတာ ကၽြန္ေတာ္

ရိပ္မိလိုက္တယ္....................ဒါနဲ႔ ဆိုင္ရွင္ ဦးၾကီးစီမွာ
ထီးတစ္ေခ်င္းေလာက္ရွိရင္ ဌားဖို႔ ကၽြန္ေတာ္ စိတ္ကူးလိုက္မိပါတယ္.............
ကၽြန္ေတာ္က ဆိုင္ရွင္ဦၚၾကီးစီကို သြားၿပီး..ဒီလိုေၿပာခဲ႔ပါတယ္.....
"ဦး.......သားကို ထီးတစ္လက္ေလာက္ရွိရင္ ခဏဌားပါလား"လို႔ေၿပာလိုက္တယ္.......

.................................................................................................
ရုတ္တစ္ရတ္............
အနီေရာင္ အက်ၤီနဲ႔ေကာင္မေလး..
သူေၿပာလိုက္ပံုက........................ဒီလို
"ဦး သမီးကို ထီးေလးတစ္ေခ်ာင္းေလာက္ ကူညီပါေနာ္"တဲ႔
သူေၿပာလိုက္တာ ကၽြန္ေတာ္နဲ႔ ၿပိဳင္တူၿဖစ္သြားပါတယ္.........

"ဟိုက္"
ဒီတစ္ခါေတာ႔ ကၽြန္ေတာ္ ေတာ္ေတာ္အံ႔ၾသ သြားပါပီ...ၿပီးေတာ႔

ရီလဲရီခ်င္ေနပါတယ္.... .....ကၽြန္ေတာ္ ေကာင္မေလးကို မၾကည္႔ပဲ မေနေတာ႔ပါဘူး...
သူ႔ကို လွမ္းအၾကည္႔မွာ.....သူဆိုတဲ႔ အနီေရာင္ေကာင္မေလး......ရွက္သြားတယ္နဲ႔

တူပါရဲ႔...............ေခါင္းၾကီးငံဳ႔ လို႔ေပါ႔............
အင္း........သူရဲ႔ ရွက္ေနတဲ႔ အမူရာေလးကို ခုထိ ကၽြန္ောတ္ မေမ႔ေသးပါဘူး........
ဘယ္ေတာ႔မွ ေမ႔လို႔ရမွာလဲ မဟုတ္ပါဘူးခင္ဗ်ာ............................
.....................................................................................................
ဆိုင္ရွင္ ဦးၾကီးက ကၽြန္ေတာ္တို႔ႏွစ္ေယာက္ိကုိ သနားလို႔နဲ႔

တူပါရဲ႔......ထီးေလးတစ္ေခ်ာင္းကို ကၽြန္ေတာ္တို႔ႏွစ္ေယာက္ိကုိ ေပးလိုက္ပါတယ္....

.အဲဒီ ထီးေလးက ကၽြန္ေတာ္ တို႔ႏွစ္ေယာက္အတြက္ အမွတ္တရေတြ

ၿဖစ္လာခဲ႔လိမ္႔မယ္လို႔ ကၽြန္ေတာ္တို႔ ႏွစ္ေယာက္လံုး

မသိခဲ႔ၾကတာအမွန္ပါပဲ.................
...................................................................................................
မိုးေတြကလဲ ရြာေနတယ္....ထီးေလးကတစ္ေခ်ာင္း.....ပီးေတာ႔

ေကာင္ေလးနဲ႔ေကာင္မေလး......ဘာေတြေၿဖစ္လာႏိုင္မလဲ...................

ကၽြန္ေတာ္နဲ႔သူ ထီးေလးတစ္ေခ်ာင္းကို တူတူ ေဆာင္းခဲ႔ပါတယ္.......
ထီးေလးကေဟာင္းေနေတာ႔ သူနဲ႔ကၽြန္ေတာ္႔ကို မလံုၿခံဳႏိုင္ေပ မဲ႔ ကၽြန္ေတာ္

ေႏြးေနတယ္လို႔ ခံစားရပါတယ္......
ေကာင္မေလးကေတာ႔ ရွက္လို႔ ေခါင္းကို မေဖာ္ေတာ႔ပါဘူးခင္ဗ်ာ.....
ေကာင္မေလး ကိုယ္မွာ ေရေတြစိုေနပါပီ............
ကၽြန္ေတာ္သူ႔ရဲ႔ ေရစိုေနတဲ႔ ခႏၵာကိုယ္ေလးကို ကၽြန္ေတာ္ ရုတ္တရတ္

ၾကည္႔မိပါတယ္....
ပီးေတာ႔............
ကၽြန္ေတာ္ ရင္ေတြ အရမ္းခုန္သြားပါတယ္.......တိတိက်က် ကၽြန္တာ္

သိလိုက္တာတစ္ခုကေတာ႔ ......ကၽြန္ေတာ္ သူ႔ကို ခ်စ္မိသြားတယ္ဆိုတာပါပဲခင္ဗ်ာ......
ေကာင္မေလးေကာ ကၽြန္ေတာ္႔ကို ရင္ေတြခုန္ေနေလမလား.....ဆိုတာ ကၽြန္ေတာ္

တိတိက်က်မသိႏိုင္ပါခင္ဗ်ာ.......................................................
ကၽြန္ေတာ္ အဲဒီေန႔က Tutorial ေၿဖခဲ႔ရပါတယ္ခင္ဗ်ာ.......သိပ္မေၿဖႏိုင္ေပမဲ႔

ကၽြန္ေတာ္႔ကိုယ္ကၽြန္ေတာ္ တကၠသိုလ္ၾကီးမွာ အေၿဖႏိုင္ဆံုးလို႔

စာရင္းူသြင္းလိုက္မိပါေတာ႔တယ္ခင္ဗ်ာ...............
.............................................................................................................
ကၽြန္ေတာ္႔ရဲ႔ အသည္းအသန္ ေကာင္မေလးကို ၾကိဳးစားမူ႔ေၾကာင္....... ကၽြန္ေတာ္နဲ႔

ေကာင္မေလး ခ်စ္သူေတြၿဖစ္ခဲ႔ၾကပါတယ္.........
ေကာင္မေလးကို ဆံုေတြ႔ခြင္႔ေပးခဲ႔တဲ႔ ထီးေလးတစ္ေခ်ာင္းရယ္.........မိုးရာသီရဲ႔

မိုးရြာတဲ႔ေန႔ေလးတစ္ေန႔ရယ္.......ေကာ္ဖိဆိုင္က ဆိုင္ရွင္ဦးၾကီးရယ္ကို ကၽြန္ေတာ္

ေမ႔လို႔ရေတာ႔မည္ မဟုတ္ပါခင္ဗ်ာ...........

.................................................................................................
အဲဒီထီးေလးေပါ႔............
ခုေခတ္ ကာလေပၚထီးေတြေလာက္ တန္ဖိုးမရွိပါဘူး....ခု ကၽြန္ေတာ္႔ရဲ႔ ထီးေလးေတာင္

ရိတိတိၿဖစ္ေနခဲ႔ပါပီ.....
ကၽြန္ေတာ္ အဲဒီထီးေလးကို ဆိုင္ရွင္ဦးၾကီးစီကေန ကၽြန္ေတာ္ ၿပန္ေတာင္းၿပီး

ထာ၀ရသိမ္းထားခဲ႔ပါတယ္.....
ကၽြန္ေတာ္႔ဘ၀ရဲ႔ မေမ႔ႏိုင္တဲ႔ ထီးေလးပါပဲခင္ဗ်ာ.........
.........................................................................................................

ကၽြန္ေတာ္တိုႏွစ္ေယာက္ဟာ တစ္ေယာက္ကိုတစ္ေယာက္ သိပ္ခ်စ္ၾကတဲ႔

ခ်စ္သူေတြအၿဖစ္ တကၠသိုလ္ ေက်ာင္းေတာ္က အသိအမွတ္ၿပဳၿခင္းခဲရပါတယ္.......
ကၽြန္ေတာ္က ေကာင္မေလးကို အရမ္းခစ်္ခဲ႔တာပါခင္ဗ်ာ.......

မွတ္မိေသးပါတယ္......ေကာင္မေလးရဲ႔ စိတ္ေကာက္တဲ႔ အမူအရာေလးကိုေပါ႔..........

တစ္ေန႔မွာ ..ကၽြန္ေတာ္က သူ႔ကို ေမးခဲ႔ပါတယ္.....ေႏြရယ္ မိုးရယ္ ေဆာင္းရယ္

ရာသီဥတုထဲမွာ ဘယ္ရာသီဥတုကိုခ်စ္လဲလို႔ေမးခဲ႔ပါတယ္...
ေကာင္မေလးက ကၽြန္ေတာ္႔ကို ၿပန္ေၿဖခဲ႔ပါတယ္...............
" ေဆာင္းရာသီကို ခ်စ္တာေပါ႔ ကိုရယ္"တဲ႔
ပီးေတာ႔ ေကာင္မေလးက ကၽြန္ာေတ္႔ကို ၿပန္ေမးလာပါတယ္...........
"ကိုေရာ ဘယ္ရာသီဥတုကိုခ်စ္လဲဟင္"တဲ႔

ကၽြန္ေတာ္က "မိုးရာသီကိုခ်စ္တာေပါ႔ သဲေလးရာ"ဆိုၿပီးူ ၿပန္ေၿဖလိုက္ေတာ႔

ေကာင္မေလးက သူၾကိဳက္သလို လိုက္မၾကိဳက္ရေကာင္းလားဆိုၿပီး ကၽြန္ေတာ္႔ကို

စိတ္ေကာက္ပါေတာ႔တယ္............မ်က္ႏွာကို တစ္ၿခားဘက္လွည္႔ ဆံပင္ေလးကို

လက္ႏွဏ္ေခ်ာင္းနဲ႔ ဖြပီး စိတ္ေကာက္ေနတဲ႔

အမူအရာေလး................ေမ႔ႏိုင္ေတာ႔မည္ မဟုတ္ပါခင္ဗ်ာ............
ကၽြန္ေတာ္ ကေၿပာၿပလိုက္ေတာ႔ သူ႔ရဲ႔ ေက်နပ္ေနပံုေလး..............
ကၽြန္ေတာ္ေၿပာလိုက္တာက ဒီလိုေပါ႔..............................................
"မိုးရာသီကို ဘာလို႔ခ်စ္လဲဆိုေတာ႔ သဲေလးနဲ႔ ကို႕ကို ဆံုေတြ႔ေစလိုေပါ႔"...လို႔

ကၽြန္ေတာ္ကေၿပာလိုက္ေတာ႔ သူေက်နပ္ၿပီး ကၽြန္ေတာ္႔ရင္ခြင္ထဲကို

အတင္းတိုး၀င္လာပါေတာ႔တယ္.....................
............................................................................................................
ဒီလိုနဲ႔.....ေကာင္မေလးနဲ႔

ကၽြန္ေတာ္......ခ်စ္လာလိုက္တာ....ေက်ာင္းေတြေတာင္ပိတ္လု နီးနီၚၿဖစ္လာပါပီ.....
ေကာင္မေလးက ေၿပာလာပါတယ္....ကၽြန္ေတာ္႔ကိုေပါ႔..........
" ေက်ာင္းေတြပိတ္ရင္ ကို သဲေလးကို လြမ္းေနပါေနာ္" တဲ႔......
ကၽြန္ေတာ္ လြမ္းေနမိမွာအမွန္ပါပဲ....
ထီးတစ္ေခ်ာင္းရယ္.......ေကာင္မေလးတစ္ေယာက္ရယ္.......မိုးရာသီရဲ႔ မိုးရြာတဲ႔

ေန႔ေလးတစ္ေန႔ရယ္ကိုေပါ႔...........................
.....................................................................................
ေကာင္မေလးရယ္..............မၾကာခင္ ေကာင္မေလးခ်စ္တဲ႔ ေဆာင္းရာသီကို

ေရာက္လာေတာ႔မယ္ေနာ္...............
ေဆာင္းက ဘယ္ေလာက္ပဲ ေအးခ်မ္းပါေစ.........ေကာင္မေလးထားခဲ႔တဲ႔ ေႏြရာသီလို

ရင္မွာပူေလာင္လြန္းလွပါတယ္ ကြယ္..............................
.......................................................................................................


ေအာ္.....ခ်စ္ရတဲ႔ ေကာင္မေလးရယ္........................


သိပ္ မၾကာခင္ အခ်ိန္ေလးအတြင္းမွာ သူအရမ္းခ်စ္တဲ႔ ေဆာင္းရာသီကို

ေရာက္လာေတာ႔မယ္ေလ..........
ဒီခ်ိန္ဆို.....သူတစ္ေယာက္ ေကာ္ဖီ ပူပူေလးတစ္ခြက္ကို

ေသာက္ေနေလမလား.....ဒါမွမဟုတ္ ကၽြန္ေတာ္႔လို အိပ္ရာကမထေသးပဲ အလြမ္းေတြ

တနင္႔တပိုးနဲ႔ အေတြးနယ္ခ်ဲ႔ေနေလမလယးဆိုတာ ကၽြန္ေတာ္လဲ

အတိအက်မသိပါခင္ဗ်ာ......................


Tune-up Utilities 2009


TuneUp Utilities 2009 can make your Windows operating system faster, more comfortable and more secure with just a few mouse clicks. And all operations performed on the operating system are completely safe, because all changes are monitored by TuneUp Rescue Center and can be undone at any time. All TuneUp Utilities modules can be accessed through a common interface that is divided into six categories.


http://ifile.it/8moiep5

Pepsky All-In-One 5.2


Pepsky All-In-One is a disc burning and multimedia conversion program comprised of multiple tools. It supports Window 2000/XP/2003/Vista (32-bit and 64-bit) operating systems. Now it provides 15 stable and easy-to-use tools for the users. These tools can be used to burn data CD/DVD, burn music CD, copy data, music, film CD/DVD, convert between different music file formats, extract audio/video from DVD, convert video files, make virtual disc (supporting encrypted games)

http://ifile.it/2vrjyae

Kaspersky Activations keys for KIS and KAV


New keys for Kaspersky Antivirus and Internet Security (updated 17 July).
http://ifile.it/xptidsz

Avira Premium Security Suite 9.0


http://ifile.it/nfh1iuq

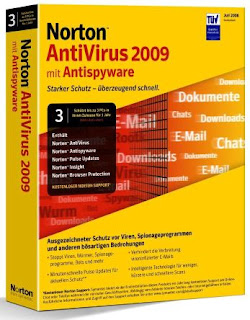
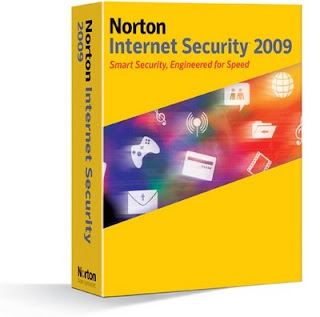
Norton Internet Security and Anti-Virus 2009


http://ifile.it/49bnht2

ႈInstall Norton Anti-Virus(NAV09em.exe)
Then,Restart computer
Aganin,At first
You need to turn off your Anti-Virus
Right Click on Norton Anti-Virus icon in notification area
Then Click to open Norton Anti-Virus
Find Setting>Miscellaneous Setting>Turn off (Norton product tempar production)


Then Open TR3.6A Folder
Find 1Box NTR3.6A .exe(this is crack)
Install it......
Ok
Finish!!!!!

If you want to install Norton Anti-Virus 2010 beta Version
Download the following Link
http://ifile.it/bnrjomd


Norton Internet Security 2009


The imstallation is as same as Norton Anti-Virus....

http://ifile.it/x69pnt5


If you want to install Norton Internet Security 2010 beta Version
Download the following Link

http://ifile.it/8zeayxd


Have a Nice Day......


Window xp sp3 Student Edition


This special Student Edition is a gem for all people annoyed by those notices about illegal copy of your Windows - there’s no WGA or update controlling so far, so you don’t have to worry about anything. Together with all updates from Microsoft, this is a really powerful combination!

No Activation required.
Ability to run windows live update
Never get the annoying illegal copy notice


http://www.zshare.net/download/625658366a2667dd/
http://www.zshare.net/download/625658746d92a9a4/
http://www.zshare.net/download/62565888d6abd27c/
http://www.zshare.net/download/62565828a1b6c6a5/
http://www.zshare.net/download/625662680177f8c5/
http://www.zshare.net/download/62566341d4d55858/
http://www.zshare.net/download/62570088c6e3eefb/


Kaspersky Internet Security 2010 key


New working key for the Kaspersky Internet Security 2010.
http://www.mediafire.com/?yozmiynimjn

Themes

My Themes are

Window Xp Visual style pack july 2009

Window xp Visual Style Pack july 2009


This pack is collection Newest & most beautifull xp themes


Sizes=106 MB

http://ifile.it/chxjl9g
http://ifile.it/ypkoui7


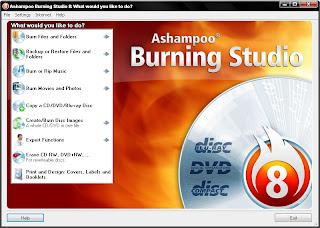
Ashampoo Burning Studio 9.05


တစ္ေယာက္ေယာက္အတြက္ အသံုး၀င္သြားရင္ ေက်နပ္ပါတယ္ခင္ဗ်ာ...

Choose Format. Select Files. Burn Disc. You just choose your format, select your files and burn your disc.


file systems or use special boot images.

The features of Ashampoo Burning Studio:
• Burn files and folders to CD/DVD/Blu-ray and add files and folders to existing discs
• Multi-disc file backup and restore on CD/DVD/Blu-ray with compression and password protection
• Create VideoCDs and Super VideoCDs
• Rip music from audio CDs to MP3, WMA and WAV files
• Create audio CDs from WAV, MP3, FLAC, WMA and Ogg Vorbis files
• Create MP3 or WMA CDs, DVDs and Blu-ray discs or just copy music to CD, DVD or Blu-ray
• Copy CDs, DVDs and Blu-ray discs
• Create and burn disc images for CD, DVD and Blu-ray
• Quickly erase any rewritable media
• Store disc images larger than 2GB on FAT32 file systems
• Interactive troubleshooting assistant for solving hardware and media problems
• Save project files so that you can burn the same discs again later
• Integrated support for over 1,700 CD, DVD and Blu-ray burners
• Video: Burn Video DVDs directly from almost any video files
• Modified and Bootable Copies: Add additional files while copying discs, make modified copies of bootable discs
• MP3 Ripping: Rip audio CDs directly to MP3 as well as WMA or WAV
• Backup and Restore: Choose archive size, restore individual files
• Expert Functions: Create bootable discs from boot images, choose file system settings
http://ifile.it/f4ncy6m

How to make Desktop not actual

Desktop ေပၚတြင္ print screen ဖမ္းရန္အတြက္ keyboard မွ print screen key ကို ႏွိပ္ပါ။
ထို႔ေနာက္ Taskbar ရွိ Strart >All programs >Accessoris မွတစ္ဆင္႔ Paint ကိုဖြင္႔ပါ။
ထို႔ေနာက္

Paint တြင္ Ctrl+V ကိုႏွိပ္ၿပီး Paste လုပ္ပါ။
Print screen key ႏွိပ္ရန္ေမ႔ခဲ႔ပါက Paste လုပ္မရပါ။
ထို႔ေနာက္ file ကို Computer ေအာက္မွ My Document ေအာက္တြင္ save ပါ။
တစ္ဖန္ Desktop ကို Right Click လုပ္ပါ။
Arrange Icon မွတစ္ဆင္႔ Show Desktop Icons ကို uncheck လုပ္ပါ။
Desktop ေပၚတြင္ Icons မ်ားေပ်ာက္ေနမည္ ၿဖစ္ပါသည္။
ထို႔ေနာက္ ဆက္လက္ကာ Desktop ကို Right Click ကာ properties ကိုသြားပါ။
ီDektop Tabမွတစ္ဆင္႔ ေစာေစာမွ save ခဲ႔ေသာ file ကိုေရြးကာ ok ေပးပါ။

Desktop အတု ၿပဳလုပ္ၿခင္းၿပီးပါသည္။

Tips and Tricks

Computer Tips and Tricks are

Making Shortcut Shutdown in Desktop

Making Shortcut shutdown in Desktop

Right Click in Desktop>New> Shortcut တစ္ခု ရယူပါ။


ထို႔ေနာက္ Typr the Location of the item ဟုေသာ boxထဲတြင္


shutdown -s -t 120 ဟုရိုက္ပါ။
Next > Ok ေပးပါ။
ွ့Shutwown Sortcut ၿပဳလုပ္ၿခင္းၿပီးဆံုးပါသည္။
Icon ေၿပာင္းလိုပါက Right Click>properties>Shortcut>Change Icon မွတစ္ဆင္႔ေၿပာင္းႏိုင္ပါသည္။
ွွ့Shutdown shortcut ကို click ပါက မၾကာခင္ စကၠန္႔အနည္းငယ္တြင္ shutdown ၿဖစ္လိမ္႔မည္ၿဖစ္ပါသည္။
ွShutdown မက်လိုပါက Run>cmd>shutdown -a ဟုၿပန္ရိုက္ပါ။


Window Xp Sp3 Angel Lite v2


Forced Install :
1- Internet Explorer 7
2- Media Player 11
3- Java 6
4- Styler
5- Windows Live Photo Gallery
6- Microsoft SQL Server 2005 Compact Edition
7- .NET Framework 2.0 SP1
8- Vista Souds
9- Some Fonts
10- RocketDock
11- NewAero Cursors

* Optional Install :
1- Real Player 11 Final
2- Fire Fox 3.0.2
3- Flash Get 1.9.6
4- nero 7
5- WinRar 3.7
6- Yahoo v.8
7- K-Lite Codec Pack 4.1.7
8- CCleaner v2.07.575
9- Paint Dot Net V.3
http://ifile.it/os5rd70
http://ifile.it/px3sj9e
http://ifile.it/e6rdasj
http://ifile.it/4f1sgk7
http://ifile.it/4atm3b7
http://ifile.it/a3ocy5z

PASSWORD=MaHmOuD

Burning Tools

The Collection of Burning tools are

Xilisoft ISO Maker 1.0

Ashampoo Burning Studio 9.05

Pepsky all in One 5.2

Power ISO 4.5

Xilisoft ISO Maker 1.0


CD burn တဲ႔ software ေလးပါ။Size ကေတာ႔ 5.2MB ပါ။

လုပ္နည္းလဲ အရမ္းလြယ္ပါသည္။အလိုရွိပါက ေအာက္တြင္ရယူႏိုင္ပါသည္။
http://ifile.it/3vct8ng


Protector Plus 2009 V8.Anti-Virus


ယခု ကာလတြင္ ကၽြန္ေတာ္သိေသာ Anti-Virus ႏွင္႔ Operating System မ်ားကိုသာ တင္ၿပပါမည္။ ယခု Anti-Virus software သည္
Sizes:14Mb ပဲရွိပါသည္။ရွာရင္းေဖြရင္းၿဖင္႔ ရရွိလာၿခင္းၿဖစ္ပါသည္။အသစ္စမ္းသံုးလိုပါက ေအာက္တြင္ရယူႏိုင္ပါသည္။


Full Version အၿဖစ္ အသံုးၿပဳႏိုင္ေစရန္ keygen ပါ၀င္ပါသည္။

http://ifile.it/17inah2


Google Search Tips

ကၽြန္ေတာ္တို႔သည္ ေန႔စဥ္ႏွင္႔အမွ် Errors မ်ားေၿဖရွင္းရန္ေသာ္လည္ေကာင္း၊software တစ္ခုခုမ်ားအား အလိုရွိေသာ အခါတြင္ Google Search Engine တြင္ ရွာေဖြလွ်က္ရွိၾကပါသည္။တစ္ဦးဦး၏ အကူအညီကို ရယူႏိုင္ေသာ္လည္း ကိုယ္တိုင္ ရွာေဖြရေသာအခါတြင္ အင္မတန္ ရွာေဖြရခက္လွပါသည္။
သို႔ၿဖစ္ပါေသာေၾကာင္႔ ကၽြန္ေတာ္သိေသာ Google Search Tips မ်ားအား တင္ၿပလို္ပါသည္။
Google Search Tips မ်ားမွာ-

(၁)"+"လကၡဏာ ကိုအသံုးၿပဳရွာေဖြၿခင္း
"+"လကၡဏာ အသံုးၿပဳၿပီး ရွာေဖြၿခင္းသည္ တိက်ေသာ စကားလံုးတစ္လံုးပါ၀င္ရမည္ဟုဆိုလိုပါသည္။အသံုးမ၀င္ေသာ related index မ်ား မပါ၀င္ေစရန္ၿဖစ္ပါသည္။
ဥပမာ။ ။+breezes+lover ဟုရွာေဖြပါက breezes ႏွင္႔ loverဟူသည္႔ စာလံုး ပါ၀င္ေသာ webpage မ်ားကို ေတြ႔ရွိရမည္ၿဖစ္ပါသည္။

(၂)"-"(အႏုတ္)လကၡဏာ ကိုအသံုးၿပဳရွာေဖြၿခင္း
"-"လကၡဏာ အသံုးၿပဳၿပီး ရွာေဖြၿခင္းသည္ မိမိရွာေဖြေသာအခါတြင္ မိမိ အလိုမရွိသည္႔ စကားလံုးမ်ား မပါ၀င္ရဟူေသာ အဓိပၸဎ္ၿဖစ္ပါသည္။
ဥပမာ။ ။-breezes +lover ဟုရွာေဖြပါက breezes ဟူေသာ စာလံုးမပါ lover ဟူေသာစာလံုးပါေသာ web page မ်ားကိုေတြ႔ရွိရမည္ၿဖစ္သည္။
(၃)"~"လကၡဏာကို အသံုးၿပဳရွာေဖြၿခင္း[အနီးစပ္ဆံုး(approximately)ဟု အဓိပၸယ္ရရွိသည္။]
"~"လကၡဏာ အသံုးၿပဳၿပီး ရွာေဖြၿခင္းသည္ မိမိရွာေဖြေသာအခါတြင္ အနီးစပ္ဆံုးအေၾကာင္းအရာတစ္ခုကိုရွာေဖြလိုေသာအခါ တြင္
မိမိရွာလိုေသာ အေၾကာင္းအရာ၏ အနီးစပ္ဆံုးေသာ webpage မ်ားကို ေတြ႔ရွိရမည္ၿဖစ္သည္။
ဥပမာ။ ။computer~hack ဟုရွာေဖြပါက hack ႏွင္႔သက္ဆိုင္ေသာ webpage မ်ားကို ေတြ႔ရွိရမည္ၿဖစ္သည္။
(၄)တိက်ေသာ website တစ္ခုကို ရွာေဖြလိုလွ်င္
[site:] ဟုရွာေဖြပါ။
ဥပမာ။ ။site:http://breezeslover.blogspot.com/ဟုရွာေဖြပါက ကၽြန္ေတာ္ website တစ္ခုအတြင္းရွိ pages မ်ားစီကိုေရာက္ရွိသြားမည္ၿဖစ္ပါသည္။
(၅)စကားလံုးတစ္လံုး၏ definitionကိုသိလိုေသာအခါတြင္ define: ဟုေသာ syntaxကို အသံုးၿပဳရွာေဖြရပါသည္။
ဥပမာ။ ။define:computerဟုရွာေဖြပါက computer defintionမ်ားကိုၿပသေပးမည္ၿဖစ္ပါသည္။
(၆)ဆင္တူေသာ စကားလံုးမ်ားကို ရွာေဖြလိုေသာအခါတြင္ related: ဟုေသာ syntax ကိုအသံုးၿပဳရပါသည္။

ဥပမာ။ ။related http://breezeslover.blogspot.com/ ဟုရွာေဖြပါက http://breezeslover.blogspot.com/ႏွင္႔ အနီးစပ္ဆံုး အနီးဆံုး webpage မ်ားကိုေတြ႔ရမည္ၿဖစ္ပါသည္။

(၇)တိက်ေသာ စကားစုမ်ားကို ရွာေဖြလိုေသာအခါတြင္ [" "]double quoteၿဖင္႔ရွာေဖြႏိုင္ပါသည္။
ဥပမာ။ ။"technical Library"ဟု ရွာေဖြပါက technical Library ပါ၀င္ေသာ တိက်ေသာ စကားစုပါ၀င္သည္႔ web pages မ်ားကိုေတြ႔ရွိရမည္ၿဖစ္ပါသည္။

(၈)'*'လကၡဏာကိုအသံုးၿပဳ ရွာေဖြၿခင္း
အဓိပၸယ္မသိေသာ စကားလံုးတစ္လံုးကိုရွာေဖြလိုေသာအခါတြင္ အသံုးၿပဳပါသည္။
ဥပမာ။ ။friend* ဟုရွာေဖြပါက friend ဟူေသာ အဓိပၸယ္ပါသည္႔ webpage မ်ားကို ၿပသေပးပါမည္။

(၉)boolean operatorsမ်ားကို အသံုးၿပဳရွာေဖြၿခင္း [AND/OR/NOT]
ဥပမာ။ ။swim OR sink ဟုရွာေဖြပါက swim သို႔မဟုတ္ sink ပါေသာ webpages မ်ားကိုၿပသေပးမည္ၿဖစ္ပါသည္။
မွတ္ခ်က္၊ ။ boolean operatorsမ်ားသည္ Capital letter မ်ားၿဖစ္ရပါမည္။
♥♥♥


How to create Recent posts in Blog

စာေရးသူ၏Blog sidebar တြင္ Recent posts ေလးမ်ားကို ေတြ႔ရမည္ၿဖစ္သည္။
အက်ိဳးမွာ အလြယ္တကူ ရွာေဖြႏိုင္ပါသည္။
လုပ္နည္းမွာလည္း ခက္ခဲၿခင္းမရွိပါ။
လုန္နည္းမွာ........


(၁)Dashboard မွတစ္ဆင္႔ layout ကိုူသြားပါ။
(၂)Layout မွတစ္ဆင္႕ Siadebar ရွိ Add a gadget ကို clickပါ။

(၃)Html/Javascript ကိူု clickပါ။
ထို႔ေနာက္ ေအာက္မွ ကုဒ္မ်ားအား ကူးယူၿပီးထည္႔ပါ။
<script src="http://www.geocities.com/uddin_81/recent-post.js"></script>
<script>var numposts = 7; var showpostdate = false; var showpostsummary =false; var numchars = 100; </script>
<script src="http://BLOG NAME.blogspot.com/feeds/posts/default?orderby=published&alt=json-in-script&callback=rp">
</script>
(၄)BLOG NAME ေနရာတြင္ မိမိ ဘေလာခ္႔နာမည္အား ေရးပါ။
numberposts ေနရာတြင္ မိမိ ေပၚေစခ်င္သည္႔ posts အေရအတြက္ကိုေရးပါ။


How to create read more in blog

ဘေလာခ္႔မ်ားတြင္ ရွည္လ်ားေသာ ပိုစ္႔မ်ားတင္ေသာအခါ မလိုအပ္ပဲ အခ်ိန္ ၾကာၿမင္႔ပါသည္။
သို႔ၿဖစ္ပါေသာေၾကာင္႔ Read more ဟုေသာ Link ၿဖင္႔ ဘေလာခ္႔ပို႔တစ္ခုအား ခ်ံဳ႔(သို႔မဟုတ္)ေခါက္ထားႏိုင္ပါသည္။
Read more link အား click ပါက ေခါက္ထားေသာ ပိုစ္႔၏ အဆံုးကို replace ၿပန္လုပ္ေပးမည္ၿဖစ္သည္။
Blog တြင္ read more ဟူေသာ link ၿပဳလုပ္ၿခင္းကို (peek-a-boo)ခ်ံဳ႔(သို႔)ပိုစ္႔ေခါက္ၿခင္းဟုေခၚပါသည္။
လုပ္နည္းအဆင္႔ဆင္႔မွာ........


(၁)ဘေလာခ္႔ကို log in ၀င္ပါ။
(၂)Dashboard မွတစ္ဆင္႔ Layout မွ Edit Html ကို click ပါ။
(၃)template မွ ညာဘက္အေပၚေထာင္႔ရွိ Expand Widgets Template ကို အမွန္ၿခစ္(check)ၿပဳလုပ္ပါ။
(၄)ေအာက္တြင္ၿပထားေသာ Html codeတစ္ခုမဟုတ္ တစ္ခု ကို ရွာေဖြပါ။ရွာေဖြရလြယ္ကူေစရန္ Ctrl+F ကိုႏွိပ္ၿပီး Search box မွတစ္ဆင္႔ရွာေဖြပါ။
<div class='post-header-line-1'/>
<div class='post-body'>
(သို႔မဟုတ္)

&alt;div class='post-header-line-1'/>
<div class='post-body entry-content'>

(၅)ေတြ႔ရွိပါက ေအာက္တြင္ေပးထားေသာ CODES မ်ားအား အေပၚရွိCODES တစ္ခုခု၏ေအာက္တြင္ ကပ္လွ်က္ထည္႔ပါ။
<b:if cond='data:blog.pageType == "item"'>
<style>.fullpost{display:inline;}</style>
<p><data:post.body/></p>
<b:else/>
<style>.fullpost{display:none;}</style>
(၆)ထို႔ေနာက္ ဆက္လက္ကာ ေအာက္တြင္ၿပထားေသာ ကုဒ္ကို ဆက္လက္ရွာေဖြပါ။
<data:post.body/>
(၇)ထို ကုဒ္၏ေအာက္တြင္ ေအာက္မွ ကူဒ္အား ဆက္လက္ ထည္႔ပါ။

<a expr:href='data:post.url'>Read More......</a>
</b:if>
Read more......စာသားေနရာတြင္ မိမိႏွစ္သက္ရာထည္႔ႏိုင္ပါသည္။
(၈)ထို႔ေနာက္ template ကို save ပါ။
(၉)ထို႔ေနာက္ Setting မွတစ္ဆင္႔ formatting ကိုသြားပါ။
(၁၀)ေအာက္မွ ကုဒ္အား ကူးယူၿပီး ေအာက္ဆံုးရွိ text area တြင္ ထည္႔ပါ။

<span class="fullpost">


</span>
(၁၁)save setting ကို click ပါ။
(၁၂)ယခုကဲ႔သို႔ၿပဳလုပ္ၿခင္းသည္ ပိုစ္႔တင္တိုင္း ပါ၀င္ေနေစရန္ၿဖစ္သည္။

Kaspersky 2010 Kav and Kis Activation Keys


Kaspersky အတြက္ Activation keys မ်ားၿဖစ္သည္။
http://ifile.it/m0oh13p

Window Vista SP2 lite edition


System requirements:
Minmum 265 MB Ram required only
Only 2.8 GB hard drive space required for install
size=690MB


Extras. Information: Intergrated SP2 into OS (not an add on)
Very fast and stable
Aero theme
Side Bar
Printer support
Accept updates
Super fast install time

DELETED
Removed components:

Accessories
Accessibility
Disk Cleanup
Games-Game Explorer
Games-Inbox Games
Games-Premium Inbox Games
Mobility Center
Paint
Snipping Tool
Speech Support
Welcome Center

Drivers
Display adapters
Diva Server
Ethernet network adapters
Modems
QLogic Fibre Channel Adapter
Scanners

Hardware Support
Fax Support
Smartcards
Windows Mobile Device Center
Windows Portable Devices
XBOX 360 Controller

Languages
Japanese
Korean
Simplified Chinese
Table Driven Text Input Processor
Traditional Chinese

Multimedia
Media Center
Movie and DVD Maker
Music and Video samples
Sample Pictures
Screensavers
Wallpapers
Windows Calendar
Windows Photo Gallery

Network
Connect to a Network Projector
Internet Information Services (IIS)
Remote Desktop and Assistance
Remote Desktop Client
Windows Collaboration
Windows Firewall

Services
Diagnostics
Distributed Transaction Coordinator (DTC)
Error Reporting
Microsoft DFS Replication
Remote Registry
SuperFetch
Windows Search

System
BitLocker Drive Encryption
Digital Locker
Disk Defragmenter
Guided Help
Help
IMAPIv2 Burning Support
Malicious Software Removal Tool
Manual Install (Setup.exe)
Microsoft Agent
Microsoft Message Queue (MSMQ)
Natural Language
Parental Controls
Performance Counters
Reliability and Performance Monitor
Remote Differential Compression
Security Center
Sync Center
System Restore
Tablet PC
Windows Backup
Windows Defender
Windows Easy Transfer
Windows SAT (Performance Index)

http://ifile.it/vgl9nt2
http://ifile.it/dzuhk7q
http://ifile.it/ekdr1z6
http://ifile.it/yklvawi
http://ifile.it/3c6inbh
http://ifile.it/1r9vnet
http://ifile.it/krz8w1d

IDM


Internet Download Manager 5.18 Beta
Internet Download Manager with Keygen and Patch

Rapidshare Auto Downloader

Rapidshare Auto Downloader


www.Rapidshare.com မွ download linksမ်ားတစ္ခုၿပီး တစ္ခု download လုပ္မည္ဆိုပါက error မ်ား ၿဖစ္ေပၚေနမည္ကိုေတြ႔ရမည္ၿဖစ္ပါသည္။Install မၿပဳပ္လုပ္ခင္ .net framework ကို download ခ်ခိုင္းပါမည္။
download ၿပဳလုပ္ၿပီး install ၿပဳလုပ္ပါ။


ထို႔ေနာက္ Rapidshare Auto Downloader ကို Install ၿပဳလုပ္ပါ။

RapidShare download link ကို Add Link အနားရွိ Text Area တြင္ paste ၿပဳလုပ္ပါ။Add Link ကို cLick ပါ။
Start download ကို clickပါ။

http://ifile.it/3af0qyi

Internet Download Manager 5.17.5 Keygen and Patch


http://ifile.it/rvujptg

လုပ္နည္းအား ဘာသာမၿပန္ေတာ႔ပါ။
Installation Notes:
1. Install Internet Download Manager
2. Close Internet Download manager
3. Start Keygen / Patcher
4. Click on Patch in Keygen / patcher and browse to find IDMan.exe
5. Click Open to patch the .exe
6. Enter a name (first and last) and a email address into keygen and click generate
7. Start Internet Download Manager
8. Go to About ... Register and Enter key
9. Click Register button

ZoneAlarm Internet Security Suite V8


http://ifile.it/4k2gce0

အထဲမွာ Keygen ပါပါသည္ key ေတာင္းပါက generate လုပ္ပါ။

Kaspersky Internet Security 2010 with Activation Key


http://ifile.it/quiz3pl

Computer Secrets (40)

Start Menu ကို ပိုမိုျမန္ဆန္ေစဖို႔
Start ကိုႏွိပ္ပါ။ Run box ကိုဖြင့္ပါ။ Regedit လို႔ရိုက္ပါ။ (Registry editor ကိုဆိုလိုတာပါ။)
ဘယ္ဘက္ panel မွာ “HEYCURRENT USER” ကို ကလစ္ႏွိပ္ပါ။ Aဲဒီထဲ ကမွ “control panel” ကို
ထပ္ေရြးပါ။ “Control panel” ထဲကမွ Desktop ကို ေရြးပါ။ ညာဘက္Aကြက္မွာ ေပၚလာတဲ့ “Menushowdelay” ကို Right click ႏိွပ္ပါ။ Modify ကိုေရြးၿပီး Value ကို “0″ ထားပါ။ ၿပီးၿပီဆိုတာနဲ႔ Restart ျပန္လုပ္ပါ။

(၂) မလိုAပ္တ့ ဲ ဖိုင္ေတြကို ရွင္းပစ္ရင္ ပိုျမန္ဆန္ ေစပါတယ္။
- Start ကိုသြားပါ။
- Run box ကိုဖြင့္ပါ။
- “gpedit.msc” ဆိုၿပီး ရိုက္ပါ။
- ဘယ္ဘက္ panel မွာ “computer configuration” ေရြးပါ။
- “Administrative Templates” ကိုေရြပါ။
- “Windows components” ကို ေရြးခ်ယ္ပါ။
- “Terminal services” ကိုေရြးခ်ယ္ပါ။
- ညာဘက္ panel မွာ ေပၚလာမွာျဖစ္တဲ့ “Do not delete Temp Folder Upon exit” မွာ Right click ႏွိပ္ပါ။
- Properties ကို ေရြးခ်ယ္ပါ။
- ၿပီးရင္ “disable” ကို ေရြးခ်ယ္ပါ။

(၃) မလိုA ပ္တဲ့ ဖိုင္ေတြကို ရွင္းပစ္ရင္ ပိုမို ျမန္ဆန္ ေစပါတယ္။
ေနာက္တစ္မ်ိဳး ရွင္းနည္း ရွိပါေသးတယ္။
- Start ကို ကလစ္ႏွိပ္ပါ။
- Run box ကိုဖြင့္ပါ္။
- “% temp%” လို႔ ရိုက္ထည့္ပါ။
- A ဲဒီမွာ ေတြ႔သမွ် ဖိုင္ေတြကို ‘Ctrl+A’ နဲ႔ Select ေပးၿပီး ဖ်က္ထုတ္ပစ္ပါ။ (A ခ်ိဳ ႔ လုပ္ေဆာင္ေနဆဲ
ဖိုင္ေတြကိုေတာ့ ဖ်က္လို႔မရတဲ့ A ေၾကာင္း ေျပာလာတတ္ပါတယ္။)


(၄) မလိုA ပ္တဲ့ ဖိုင္ေတြကို ရွင္းပစ္ရင္ ပိုမို ျမန္ဆန္ ေစပါတယ္။
ေနာက္တစ္မ်ိဳး ရွင္းနည္း ရွိပါေသးတယ္။
- Start > Run box ကိုဖြင့္ပါ။
- “Prefetch” လို႔ ရိုက္ထည့္ပါ။
- ေတြ႔သမွ် ဖိုင္မွန္သမွ် ဖ်က္ပစ္ပါ။

(၅) Hard disk ကို Aခ်ိန္ရွိသေရြ ႔ ရွင္းလင္းေပးပါ။
- All Program ကိုသြားပါ။
- Accessories ကေနတစ္ဆင့္ “System tools” ေA ာက္မွာ ရွိေနတဲ့ “Disk Clean Up” ကို ကလစ္ႏွိပ္ပါ။ ၅
မိႏွစ္A တြင္းမွာ ပုန္းကြယ္ေနတဲ့ A မႈိက္သရိုက္ေတြ မွန္သမွ်ကို ရွင္းလင္းေပးပါလိမ့္မယ္။ (ကိုယ္A ေနနဲ႔
A ျပင္ကို ခဏတျဖဳတ္ သြားမယ့္ A ခ်ိန္မ်ိဳးေတြမွာ သိပ္A သံုး၀င္ပါတယ္။)

(၆) မသံုးတဲ့ ပရိုဂရမ္ေတြကို ဖယ္ထုတ္ပါ။
- Start > Run
- “msconfig” လို႔ရို္က္ပါ။
- “System configuration Utility” box ေပၚလာပါမယ္။
- ညာဘက္ A စြန္းဆံုးမွာ “Start up tab” ဆိုတာ ရွိပါတယ္။
- ကိုယ့္A တြက္ A သံုးမ၀င္တဲ့ program ေတြရဲ ႔ ေရွ ႔ မွာ A မွန္ျခစ္ A မွတ္ A သား လုပ္ထားခဲ့ရင္ ျပန္ၿပီး
“uncheck” လုပ္ေပးပါ။
- Restart န႔ ဲ ျပန္စပါ။

(၇) လံုျခံဳေစဖို႔ ဖိုင္စႏွစ္ ေျပာင္းသံုးပါ။
- Start > all programs > accessories > command prompt တစ္ခုခ်င္း ကလစ္ႏွိပ္ၿပီး သြားပါ။
- Command pormpt ေပၚလာရင္ A နက္ screen ႀကီးကို ေတြ႔ရပါမယ္။
- မွိတ္တုတ္မွိတ္တုတ္ cursor ေလးနဲ႔ “convert c:fs:ntfs” လို႔ရိုက္ပါ။
- ၿပီးရင္ ‘Enter’ ေခါက္ပါ။
- Command prompt ကို ေနာက္ တစ္မ်ိဳး “Start > Run” မွာ cmd လို႔ ရိုက္ထည့္ၿပီး သြားႏိုင္ပါတယ္။
- တကယ္လို႔ NTFS ေျပာင္းၿပီးသား ဆိုရင္ ေျပာင္းဖို႔ မလိုပါ။ My computer ကို Right Click ႏွိ္ပ္ၿပီး
“properties” မွာဖြင့္ၾကည့္ ႏိုင္ပါတယ္။
- cmd ထဲ၀င္ၿပီး ျပန္ထြက္မရ ျဖစ္ေနရင္ “exit” လို႔ရိုက္ၿပီး ထြက္ပါ။

(၈) Memory ပိုမို A လုပ္လုပ္ေစႏိုင္ဖို႔
- XP ရ့ ဲ default မွာ memory ေရရွည္ A သုံးခံႏိုင္ေA ာင္နဲ့႔ တျခား လိုA ပ္တဲ့ စနစ္ပိုင္း ဆိုင္ရာေတြကို
ေမာင္းႏွင္ဖို႔ စီမံထားပါတယ္။ ဒါေပမယ့္ တစ္ခါတေလမွာ ကိုယ့္A တြက္ A သံုးမ၀င္ပါဘူး။ ရွိရင္းစြဲ memory
ကိုပဲ လွည့္ကြက္တစ္ခု A ေနနဲ႔ ပိုၿပီး ေကာင္းမြန္ေA ာင္ သံုးစြဲႏိုင္ပါတယ္။
- Start > Run > Regedit A ဆင့္ဆင့္သြားပါ။
- Registry panel ရဲ့ ဘယ္ဘက္မွာ “HKEYLOCALMACHINE” ကို click ႏွိပ္ပါ။
- “System” ကို ကလစ္ ႏွိပ္ပါ။
- “Current control set” ကို ကလစ္ ႏွိပ္ပါ။
- “control” ကို ကလစ္နွိပ္ပါ။
- “Session Manager” ကို ႏွိပ္ပါ။
- “Memory Managment” ကိုကလစ္နွိပ္ပါ။ ညာဘက္ panel မွာ ရွိတဲ့ “Disable pasing executive” ကို
Double Click နဲ႕ ဖြင့္ပါ။
- Large System Cache ကိုလည္း double click နဲ႕ ဖြင့္ပါ။
- Decimal value ကို “1″ ေျပာင္းေပးပါ။
- Restart ျပန္လုပ္ပါ။ Memory Performance ပိုျပီး ေကာင္းမြန္လာပါလိမ့္မယ္။

(၉) ဖိုင္ေတြကိုလံုျခံဳေစဖိုိ႕ password ေပးပါ။
ကိုယ့္ရဲ႕ဖိုင္ေတြ၊ folder ေတြ၊ ebook စတာေတြကို လံုျခံဳေစဖို႕ နည္းလမ္းA ေျမာက္A ျမား ရွိပါတယ္။
password ေပးျပီး သိမ္းဆည္းထားတာဟာ A လံုAျခံဳဆံုးပါပဲ။ A ဲဒီလို password ေပးတဲ့A ခါမွာ
သိမ္းဆည္းခ်င္တဲ့ ဖိုင္ေတြကို folder တစ္ခုထဲကို A ရင္ထည့္ပါ။ ျပီးရင္ကုိယ္မွတ္မိတဲ့ Name ေျပာင္းပါ။ ျပီးရင္
Windows ရဲ႕ built-in zip format ကို password ေပးပါ။
- Zip Software ကို install လုပ္ျပီး သံုးစြဲတာက ပိုေကာင္းပါတယ္။
- Win Zip Software ကို ဖြင့္ပါ။
- File menu ေA ာက္မွာရွိတဲ့ Add a password ကို ကလစ္ႏွိပ္ပါ။
Winrar Software ကို install လုပ္ ခဲ့မယ္ဆိုရင္ေတာ့
- ဖိုင္ကိုကလစ္ေထာက္လိုက္ျပီး ခ်ံဳ႕ေပးပါ…လို႕ ခိုင္းပါ။
- Advanced မွာ “Set password” ကို click ႏွိပ္ပါ။
- Password line ႏွစ္ေၾကာင္း ေတြ႕ရပါလိမ့္မယ္။ တစ္ခုနဲ႕တစ္ခု တူညီရပါမယ္။

(၁၀) ဖိုင္ေတြ လံုျခံဳေစဖို႕ ရုပ္ဖ်က္ထားနုိင္ပါတယ္။
ေဆာ့ဖ္၀ဲA သံုးျပဳထားတဲ့ ဖိုင္မွန္သမွ်ဟာ A ဲဒီေဆာ့ဖ္၀ဲရဲ႕ extension နဲ႕ A ဆံုးသတ္ပါတယ္။ Uပမာ ebook
စာA ုပ္ေတြဆိုရင္ (.pdf)၊ စာစီစာရိုက္ ေဆာ့ဖဲ၀ဲ pagemaker ဆိုရင္ (.pmd)၊ Photoshop ဆိုိရင္ (.psd)
(.jpg) စတ့ ဲ A ဆုံးသတ္ extension ေတြပါ၀င္ပါတယ္။ A ဲဒီ extension ေတြကို ေဖာ္ထားလို႕ ရသလို
ေဖ်ာက္ထားလို႕လည္းရပါတယ္။
- ပထမဆံုး My Computer ကိုကလစ္နွိပ္ျပီး A ထဲကို ၀င္ပါ။
- Folder options ကို သြားပါ။ (Tools ေA ာက္မွာ ရွိပါတယ္။)
A ဲဒီက “File Types” ကို ကလစ္ နွိပ္ပါ။ (A ဲဒီA ခါမွာ ဖိုင္ရဲ႕ extension ေတြ တစ္ခုခ်င္းစီA လိုက္
ေပၚလာပါလိမ့္မယ္။
- A ခု ဖံုးကြယ္ထားမယ့္ ဖိုင္တစ္ခုကို extension ေျပာင္းေပးပါ။ Uပမာကိုယ္က (.pmd)နဲ့႔ စာရိုက္ထားတဲ့ page
တစ္ခုကို ေဖ်ာက္ထားခ်င္ရင္ A ဲဒီ (.pmd) ေနရာမွာ (.pdf) စသည္ျဖင့္ ေျပာင္းလဲေပးလိုက္ပါ။
- ၿပီးရင္ extension ေဖာ္ထုတ္ထားတာကို ျပန္ၿပီး ေဖ်ာက္ပစ္လိုက္ပါ။
- A ဒီA ခါမွာ ကိုယ့္ဖိုင္ဟာ ကိုယ္ကိုယ္တိုင္ေတာင္မွ မမွတ္မိ ႏိုင္ေတာ့တဲ့ ဖိုင္A မ်ိဳးA စား တစ္ခုA ေနနဲ႔
ေျပာင္းလဲသြားပါလိမ့္မယ္။

(၁၁) ပရိုဂရမ္ရဲ့ A ျမန္ႏႈန္းေတြကို ျမွင့္တင္ပါ္။
Screen ရဲ့ ေA ာက္ေျခမွာရွိတဲ့ ‘taskbar’ ကို Right click လုပ္ပါ။
- ေပၚလာတဲ့ box ထဲက ‘Task Manager’ ေရြးပါ။
- ‘Task Manager’ ထဲကမွ ‘process tab’ ကို ေရြးခ်ယ္ပါ။ ကိုယ့္ ပီစီထဲမွာ ရွိတဲ့ ပရိုဂရမ္ေတြ၊ browser ေတြ
ေပၚထြက္ လာပါလိမ့္္မယ္။
- ကိုယ္ မၾကာခဏ သံုးစြဲေလ့ရွိတဲ့ ပရိုဂရမ္ေပၚမွာ “Right Click” ႏွိပ္ပါ။
- ‘pirority’ ကို High လုပ္လိုက္ပါ။
- ကိုယ္သုံးစဲတြ ့ ဲ ပရိုဂရမ္ဟာ သိသိသာသာ A ျမန္ႏႈန္း ျမင့္တက္လာပါလိမ့္မယ္။

(၁၂) Hibernate မလုပ္ပါနဲ့။
Hibernate ကုိ ကြန္ပ်ဴတာ သမားေတြ A သိမ်ားပါတယ္။ ေနာက္တစ္ေန႔မွာ ကိုယ္သံုးစြဲထားခဲ့တဲ့
ပရိုဂရမ္ေတြAတိုင္း ျပန္ေပၚထြက္လာေAာင္ စီစU္ေပးထားတာပါ။ ဒါေပမယ့္ memory ကို Aရမ္းစားၿပီး hard
disk မွာလည္း မတရား ေနရာယူလြန္းပါတယ္။
- Control Panel ကိုဖြင့္ပါ။
- Power Options ကို click ႏွိပ္ပါ။
- Hibernate ကို ေရြးခ်ယ္ပါ။
- ‘Enable hibernation’ ကို ‘Uncheek’ ျပန္လုပ္ပါ။ (ခြင့္မျပဳဘူး ဆိုတဲ့ သေဘာပါ။)

(၁၃) Memory နည္းပါးေနတဲ့ Aခါ
Aျမဲလို ၾကံဳရဘူးပါတယ္။ ေဆာ့ဖ္၀ဲ ႏွစ္ခုေလာက္ၿပိဳင္Aလုပ္လုပ္တဲ့Aခါ ‘Memory Inerupt’ ဆိုၿပီး
ေဆာ့ဖ္၀ဲ တစ္ကို ပိတ္သြားတာမ်ိဳး ရွိသူေတြAတြက္ ေလွ်ာ့ခ်သင့္တဲ့ ပံုစံေတြ ရွိပါတယ္။ XP မွာ
Aသစ္ေပါင္းထည့္ထားတဲ့ feature Aသစ္ဟာ momery ကို Aလြန ္သုံးစဲသြ လို “Thames” ေတြကလည္း
memory ကို သံုးစြဲပါတယ္။ ဒါေၾကာင့္ Style XP လို “Thames” ေတကြ ို memory ျမင့္ျမင့္မားမား မရိွဘဲနဲ႔
install မလုပ္ပါန႔။ဲ Window ရ့ဲ ဂႏၱ၀င္ ပုံစံဟာ memory ကို ေခၽြတာရာေရာက္ၿပီး Aလုပ္ မ်ားမ်ားရိွတဲ့
လူေတြAဖို႔ သင့္ေတာ္ပါတယ္။
- Control Panel > System
- Advanced tab ေရြးခ်ယ္ပါ။
- ‘Performance’ မွာ ’setting’ ဆိုတာ ပါ၀င္ပါတယ္။ A ဲဒီ setting ကို ကလစ္ႏွိပ္ၿပီး ‘Adjust for best
performance’ ကို ေရြးခ်ယ္ပါ။
ေနာက္တစ္နည္းနဲ႔ Start Menu ကို ဂႏၱ၀င္ ပုံစံေျပာင္းလို႔ ရေသးေပမယ့္ A ခုနည္းက OS ကေန
A လိုA ေလွ်က္ ညွိႏိႈင္း ေဆာင္ရြက္ေပးတဲ့ A တြက္ ေကာင္းပါတယ္။

(၁၄) Automatic update ကို ပိတ္သင့္ပါသလား။
A င္တာနက္ ခ်ိတ္ဆက္ထားတဲ့ ပီစီေတြ A ဖို႔ေတာ့ Automatic update ကို ပိတ္ထားတာဟာ A ဆိုးေရာ
A ေကာင္းေရာ ျဖစ္ေစပါတယ္။ A ဆိုးကေတာ့ browser မွာ ထည့္သြင္းထားတဲ့ ‘add-ons’ လို update ေတ
ြမရႏိုင္ ေတာ့ပါ။ A ေကာင္းဘက္ ကေတာ့ memory ကို ပိုမို မ်ားျပားစြာ သံုးစြဲေစျပီး XP ကို ပိုျမန္ေစပါတယ္။
- Control Panel > System
- Automatic updating ကို Turn Off လုပ္ေပးပါ။

(၁၅) ပရိုဂရမ္ေတြကုိ Shortcuts ေတြ တည္ေဆာက္ထားပါ။
- Desktop မွာ New Floder ဖန္တီးၿပီး ‘Application’ လို႔ A မည္ေပးပါ။
- ၿပီးရင္ ပရိုဂရမ္ ေတြရဲ့ Shortcuts ေတြ မွန္သမွ် ထည့္ေပးပါ။
- Taskbar မွာ Right Click ႏွိပ္ၿပီး toolbar မွာ ‘New toolbar’ ကို သြားပါ။
- A ခုန တည္ေဆာက္ထားတဲ့ ‘Application’(New Floder)’ ဆီကို ညႊန္းေပးပါ။
- ပီစီဖြင့္တိုင္းမွာ Shortcuts ေတြကေန တစ္ဆင့္ A ျမန္ဆံုး A လုပ္လုပ္ႏိုင္ပါမယ္။

(၁၆) ‘Shut-down’ shortcut ဖန္တီးႏိုင္ပါတယ္။
- Desktop မွာ Right Click ႏွိ္ပ္ပါ။ New shotcut ကို ဖန္တီးပါ။
- နာမည္မွာ ’shutdown-s-to’ လို႔ A မည္ေပးပါ။
- ၿပီးရင္ properties ကို သြားပါ။ Target ေနရာမွာ “C:/Windows/system32/shutdown.exe”ကို ေရြးေပးပါ။
(XP.SP2 သမားေတြA တြက္ေတာ့ A လြယ္တကူနဲ႔ C > Windows > System32 > “shutdown icon” A ထိ
သြားၿပီး shutcut ဖန္တီးႏိုင္ပါတယ္။)

(၁၇) Keyboard shotcut ေတြကိုသံုးပါ။
Ctrl+A ဆိုတာ Select All ၊ Ctrl+C ဆိုတာ Copy ၊ Ctrl+V ဆိုတာ Pasteဒီလိုိမိ်ဳး ၿမန္ဆန္ေစတဲ့
ကီးဘုတ္ၿဖတ္လမ္း နည္းေလးေတြကို သံုးစဲြၾကည့္ ႏိုင္ပါတယ္။

(၁၈) Fonts ေတြကို ခဏ ဖယ္ထုတ္ထားပါ။
ျဖစ္ႏိုင္ရင္ေတာ့ တခ်ိဳ ႔ Fonts ေတြဟာ UပမာAားျဖင့္ ကိုယ္ဟာ စာစီစာရိုက္ သမားတစ္ေယာက္၊ Web
designer တစ္ေယာက္မဟုတ္ရင္ မလိုAပ္တဲ့ font ေတြကို Aၿပီးတိုင္ ဖယ္ထုတ္ထားလို႔ ရပါတယ္။
Photoshop လို ပရိုဂရမ္မ်ိဳးဟာ ဖြင့္ခ်ိန္ Aရမ္းၾကာျမင့္တာဟာ သူ႔ရ့ ဲ library ထဲကို Aသင့္သုံးပစၥည္းေတြကို
ေခၚယူေနတာေၾကာင့္ပါ။ Aဲဒီ လိုမ်ိဳးပဲ တျခားပရိုဂရမ္ေ္တြဟာ ၾကာေနတတ္တာဟာလည္း Aေၾကာင္းAမ်ိဳးမ်ိဳး
ရွိႏိုင္ၿပီၤး Aဒီထဲက Aေၾကာင္းတစ္ခုက ‘Fonts’ ေတြကို loading လုပ္ေနရလို႔ပဲ ျဖစ္ပါတယ္။
- Control Panel > Fonts ကို ဖြင့္ပါ။
- Folder Aသစ္တစ္ခု ေဆာက္ပါ။ Aသံုးမလိုတဲ့ Fonts ေတြကို သီးသန္႔ ေပါင္း စုထားၿပီး၊ control panel
ကေန ခြဲထုတ္ေနရာ ေရႊ ႔ ပစ္လိုက္ပါ။
- ဒါဟာ ပရိုဂရမ္ေတြကို ျမန္ဆန္ေစတဲ့ လွ်ိဳ ႔၀ွက္ခ်က္ တစ္ခုပါပဲ။

(၁၉) Font Aရြယ္Aစား ေျပာင္းလဲ ၾကည့္ႏိုင္ရန္
Aင္တာနက္ သံုးစြဲ ေနတဲ့ Aခ်ိန္မွုာ Image ေပၚမွာ ေရးထားတဲ့ စာလံုးေတြကိုပဲ ျဖစ္ျဖစ္ တျခားေနရာ မ်ိဳးစံုက
Aကၡရာေတြကိုပဲ ျဖစ္ျဖစ္ ပိုမိုသဲကြဲစြာ ျမင္ႏိုင္ဖို႔ နည္းရွိပါတယ္။
- Ctrl ကို ဖိထားရင္း keyboard Aေပၚတန္းက “+” ကို ႏွိပ္ပါ။ ႏွိပ္ေလေလ font နဲ႔ webpage စာမ်က္ႏွာ
ႀကီးလာေလေလ ျဖစ္ပါလိမ့္မယ္။ Aရြယ္Aစား ေလွ်ာ့ခ်ဖို႔ ကေတာ့ ‘Ctrl’ နဲ႔ Aႏႈတ္လကၡဏာကုိ
တြဲဖက္Aသံုးျပဳပါ။

(၂၀) Shift + Delete ကုိ သတိထားပါ။
ရိုးရိုး Delete ဟာ ဖိုင္တစ္ခုကို ဖ်က္ပစ္လိုက္ေပမယ့္ Aမႈိက္ပံုးထဲမွာ ကိုယ္စားက်န္ပါေသးတယ္။ Shift Key
ကို သတိထားၿပီး Delete ခလုတ္ကို ႏွိပ္ခ်လိုက္မယ္ ဆိုရင္ေတာ့ Aၿပီးတိုင္ ဖ်က္ေပးသြားပါလိမ့္မယ္။ မလိုလား
Aပ္တဲ့ Aက်ိဳးဆက္ေတြ ျဖစ္ေစႏိုင္တာမို႔ ‘Shift + Del’ ကို သတိထားၿပီး သံုးစြဲပါ။

(၂၁) Error report ကို ပယ္ဖ်က္ပါ။
ပရိုဂရမ္ေတြ မ်ိဳးစံု ဖြင့္ေနရင္း တစ္ခါတစ္ေလမွာ ပရိုဂရမ္ တစ္ခုခုဟာ ၾကာျမင့္ေနတဲ့ Aခ်ိန္မွာ hang
မသြားခင္မွာ windows ရဲ့ ‘Error report’ box တက္လာတတ္ပါတယ္။ Aဲဒါကို ေဖ်ာက္ထားပစ္ပါ။
- Control Panel > System
- ၿပီးရင္ Advanced ကို click ႏွိပ္ပါ။A ဲဒီထဲကမွ ‘Error Reporting’ Disable ကို ကလစ္ႏွိပ္ၿပီး OK နဲ႔ ထြက္ပါ။

(၂၂) ‘Open-with’ ဆိုတာ
ဗီဒီယိုဖိုင္ေတြ Aတြက္ဆိုရင္ ‘Open-with’ ဟာ A လြန္A သံုး၀င္ပါတယ္။ window media player ကို
လက္မခံတ့ ဲ file extension ေတြကို open-with နဲ႔ ဖြင့္လွစ္ရပါမယ္။ (A ရင္ဆုံး player တခ်ိဳ ႔ကိုေတာ့ install
လုပ္ဖို႔ လိုပါလိမ့္မယ္။)
- ဖြင့္ခ်င္တဲ့ ဖိုင္တစ္ခုက္ို ‘Right Click’ ေထာက္ၿပီး ‘open with’ ကို ေရြးခ်ယ္ပါ။
- ‘Browser’ လုပ္လိုက္ရင္ ပရိုဂရမ္ေတြ AစီA ရီ ေပၚထြက္လာပါလိမ့္မယ္။ စိတ္ႀကိဳက္တစ္ခုကို ေရြးခ်ယ္ၿပီး
ဖြင့္လွစ္ ႏိုင္ပါတယ္။ ဘယ္လိုမွ် ဖြင့္ၾကည့္လို႔ မရဘူးထင္တဲ့ Note pad ပံုစံ ပရိုဂရမ္ေတြကို word pad နဲ့႔
ဖြင့္လို႔ ရပါတယ္။

(၂၃) Open-with ဟာ ပိုၿပီး ျမန္ဆန္ပါတယ္။
Photoshop မွာ (.psd) ဆိုတဲ့ ပရိုဂရမ္ပုိင္ extension ေတြက လႊဲလို႔ တျခားပံုရိပ္ေတြကို ဖြင့္ၾကည့္ခ်င္ရင္
‘open-with’ က ပိုၿပီးျမန္ဆန္ပါတယ္။
Open-with ကေန ‘Image Viewer’ ကို ေရြးခ်ယ္ေပးပါ။

(၂၄) Filmstrip နဲ႔ ရုပ္ရွင္ ၾကည့္ႏိုင္ပါတယ္။
ကိုယ့္မွာရိွတ့ ဲ ပုံရိပ္ေတြ Aားလုံးကို floder ထဲမွာ တစ္စု တစ္စည္းတည္း ထားလိုက္ပါ။ ဓါတ္ပုံေတြ Aားလုံးကို
ရုပ္ရွင္ တစ္ခုကို ၾကည့္ေနရသလုိမ်ိဳး စီ္ထားႏိုင္ပါတယ္။
- Floder ကုိ ဖြင့္လိုက္ပါ။
- ၿပီးရင္ Menu bar ထဲက ‘View’ မွာ Filmstrip ကို ေရြးခ်ယ္လိုက္ပါ။
- Ctrl Key ကို ကိုင္ထားၿပီး လိုAပ္သလို Aကြက္ေရႊ ႔လို႔ ရပါတယ္။

(၂၅) IE ရဲ့ homepage ကုိ Blank လုပ္ထားပါ။
IE ကို ဖြင့္ရာမွာ တစ္ခါတေလ စိတ္ပ်က္ဖို႔ ေကာင္းပါတယ္။ မိုက္ကရိုေဆာ့ဖ္ ရဲ့ default home page
“msn.com” ဟာ ၿငီးေငြ႔စရာ ေကာင္းေလာက္ေAာင္ကို ၾကာျမင့္လြန္း တတ္ပါတယ္။ တကယ္လို႔ IE ကို
ဖြင့္လိုက္တိုင္းမွာ Aျဖဴထည္ စာမ်က္ႏွာ ျဖစ္ေနတာဟာ ပိုၿပီး ျမန္ဆန္ ေစပါတယ္။
- IE ကို ဖြင့္ပါ။
- Tools ကို ကလစ္ႏွိပ္ပါ။ General ေAာက္မွာ ရွိတဲ့ address box မွာ user blank ကုိ ကလစ္ႏွိပ္ပါ။
- Apply ကို ကလစ္ႏွိပ္ပါ။ OK ကို ကလစ္ႏွိပ္ပါ။

(၂၆) Domain ေတြကို key နဲ႔ သံုးပါ။
- www. google.com ကို သြားဖို႔ A တြက္ A ရွည္ႀကီး ရိုက္ေနဖို႔ မလိုပါဘူး။
- google ကုိ ရိုက္ပါ။ ၿပီးရင္ Ctrl key ကု္ိင္ထားၿပီး Enter ေခါက္ပါ။ A ဲဒီလို short-cuts ေတြကို ေလ့လာရင္း
သံုးစြဲရင္ ပိုျမန္ဆန္ ေစပါတယ္။

(၂၇) ‘Animated dog’ ဟာ ေလးလံပါတယ္။ ပယ္ဖ်က္ထားပါ။
Search box ဟာ A လြန္ေႏွးပါတယ္။ စက္ကို crash ျဖစ္သြား ေစမတတ္ ပါဘဲ။ A ဲဒီ ေခြးကေလးကို
ပယ္ဖ်က္ထားပါ။
- Search window ကုိ ဖြင့္ပါ။
- Change preferences ကုိ click လုပ္ပါ။
- ‘Without an animated screen character’ ကုိ ကလစ္ႏွိပ္ပါ။
- Animated object မရွိေတာ့တဲ့ Aတြက္ Search box ဟာ ပိုၿပီး ျမန္ဆန္ လာပါလိမ့္မယ္။

(၂၈) Network A တြင္းေလ့လာ ၾကည့္ျခင္း
ကိုယ့္ရဲ့ network Eရိယာ မ်ားမွာ ဘယ္သူေတြ ရွိေနသလဲ ဆိုတာ ၾကည့္ရႈခ်င္ရင္ My Network places ကေန
ၾကည့္ရႈလို႔ ရပါတယ္။ ပီစီတစ္လံုးကေန ေနာက္တစ္လံုး ဆီကို access လုပ္ဖို႔ ကို ေတာ့ admin ခြင့္ျပဳခ်က္
ဒါမွမဟုတ္ password ရယူရပါမယ္။ My Network places မွာ ‘view word group computer’ ကိုေရြးလို္က္။
Aဆက္Aသြယ္ ေတြ Aကုန္လံုးကို ေတြ႔ရပါလိမ့္မယ္။

(၂၉) MP3 သီခ်င္းေတြကို ကလစ္တစ္ခ်က္တည္းနဲ႔ ဖြင့္ႏိုင္ပါတယ္။
- Control panel > Taslbar and Start Menu ကို ေရြးခ်ယ္ပါ။
- Start Menu ကုိ ကလစ္ႏွိပ္ပါ။
- Customize ကို ကလစ္ႏွိပ္ပါ။
- Advanced tab ကို ကလစ္ႏွိပ္ပါ။
- My Music ကုိ ေရြးခ်ယ္ပါ။

(၃၀) Print Screen သို႔မဟုတ္ Capture ဖမ္းယူျခင္း
ကြန္ပ်ဴတာေပၚက ျမင္းကြင္းတစ္ခုခုကုိ ပံုရိပ္A ေနနဲ့႔ ကူးယူၿပီး ကိုယ့္A တြက္ ျပန္လည္၍ A သံုးခ်ႏိုင္ပါတယ္။
- လိုခ်င္တဲ့ image ဒါမွမဟုတ္ webpage ကုိ ဖြင့္ပါ။
- Keyboard က ‘print screen preview’ ကုိ ကလစ္ႏွိပ္ပါ။ (ဖြင့္ထားတဲ့ ပံုရိပ္ A နည္းငယ္သာ လိုခ်င္ရင္ Alt
နဲ႔ တြဲႏွိပ္ပါ။)
- ၿပီးရင္ Start > Run box မွာ ‘mspaint’ဆိုၿပီး စာရိုက္ပါ။ (ရိုးရိုး paint program ကို ေခၚသံုးရင္လည္း
ရပါတယ္။)
- paint ေပၚလာၿပီဆိုတာနဲ႔ ‘Ctrl+V’ ဒါမွမဟုတ္ ‘File menu’ ေA ာက္က ‘paste’ ကို ကလစ္ႏွိပ္ပါ။ (ဤ paint
ေနရာမွာ A ျခား Clipboard ရွိတဲ့ ဓါတ္ပံု တည္းျဖတ္ ေဆာ့ဖ္၀ဲ ေတြ photoshop corel draw စတာေတြ သံုးစြဲ
ႏိုင္ပါတယ္။

(၃၁) Screen Saver ကို Slide Show လုပ္ႏိုင္ပါတယ္။
- Control Panel > display
- Display properies box က်လာရင္ ’screen saver tab’ ကုိ ေရြးခ်ယ္ပါ။
- ေနာက္ဆိုရင္ Screen Saver ဟာ ရုပ္ရွင္ေတြ ျပသလိုမ်ိဳး ပံုရိပ္ေတြ တစ္မ်ိဳးၿပီးတစ္မ်ိဳး မရိုးႏိူင္ေA ာင္
ေပၚလာပါလိမ့္မယ္။
- (My Picture folder ထဲမွာ ကိုယ္လိုခ်င္တဲ့ Image ေတြကို A ရင္ဆံုးထည့္ထားရပါမယ္။ Slide Show မွာ
ပုံရိပ္တစ္ခု န႔ ဲ တစ္ခုA ၾကား ၾကာျမင့္ခ်ိန္ကို္ စိတ္ႀကိဳက္ ေရြးခ်ယ္ ေျပာင္းလဲ ႏိုင္ပါတယ္။)


(၃၂) Pop-up ေတြကို လက္မခံပါနဲ႔။
Firefox browser မွာ pop-up blocker ဆိုၿပီး လံုၿခံဳေရး tool ပါ၀င္တဲ့ A ျပင္ add-ons ေတြနဲ႔ A ထူး ပိတ္ပင္
တားဆီးလို႔ ရႏိုင္ပါတယ္။ IE ရဲ့ေနာက္ဆံုးထြက္ version7.0 ကုိ install လုပ္လိုက္မယ္ ဆိုရင္ေတာ့ pop-up
ျပႆနာဟာ ၇၀% ေလွ်ာ႔က် သြားမွာ ျဖစ္ပါတယ္။ ဒါေၾကာင့္ browser မွန္သမွ်ရဲ့ ေနာက္ဆံုးထုတ္ version
ကုိ ရေA ာင္ ယူထားပါ။


(၃၃) Toolbar ျပဳျပင္ျခင္း
- firefox မွာ Menubar ေပၚမွာ Right click ႏွိပ္ပါ။
- A ဲဒီထဲက ေပၚလာတဲ့ customize bar ထဲကုိ ကိုယ္လိုခ်င္တဲ့ ‘icon’ ေတြကုိ ေပါင္းထည့္ ေပးပါ။
IE A တြက္ကေတာ့
- IE ကို ဖြင့္ပါ။
- View > toolbar > customize
- AဲဒီAထဲကမွ စိတ္ႀကိဳက္ ျပင္ဆင္ႏိုင္ပါတယ္။ ဒီလိုျပင္ဆင္ ထားတဲ့Aတြက္ ကိုယ္လိုခ်င္တဲ့ Aခ်ိန္မွာ
လိုသလို Aသံုးခ်ႏိုင္တဲ့ icon ေတြ Aဆင္သင့္ ျမန္ျမန္ ဆန္ဆန္ ရွိေနမွာပါ။


(၃၄) Private data ကို လံုၿခံဳေAာင္ထားပါ။
- IE ကိုဖြင့္ပါ။ Tools Menu မွာ ရွိတဲံ့ internet options ကေန Clear History ကို ကလစ္ႏွိပ္ပါ။ ‘Cache’
ကိုရွင္းပါ။ ပိုၿပီး Aႏၱရာယ္ ကင္းေစခ်င္ရင္ ‘Cookies’ ေတြကို ရွင္းပါ။
Firefox ကို ဖြင့္ပါ။ “Options” ကို ကလစ္ႏွိပ္ပါ။
- Privacy ကို ကလစ္ႏွိပ္တဲ့Aခါမွာ box ရဲ့ ေAာက္ဆံုးမွာ “private data” ေတြ႔ရပါမယ္။ “Setting” ကို ၀င္ၿပီး
Aမွန္ျခစ္ေတြ ေပးထားပါ။ OK ႏွိပ္ၿပီး ျပန္ထြက္ပါ။ “Always Clear my private data when I close firefox”
ေရွ ႔မွာ A မွန္ျခစ္ေပးပါ။ Cyber cafe မွာ သုံးစဲြဖို႔ သင့္ေတာ္ေစတ့ ဲ tool တစ္ခုပါ။


(၃၅) Entry ေတြကို ရွင္းလင္းပါ။
- Start > Run
- Regedit လို႔ရိုက္ၿပီး Enter ေခါက္ပါ။
- HKEY_LOCAL_MACHINE ကို ကလစ္ႏွိပ္ပါ။
- Software ကို ကလစ္ႏွိပ္ပါ။
- Microsoft ကို ကလစ္ႏွိပ္ပါ။
- Windows ကို ကလစ္ႏွိပ္ပါ။
- Current Version ကို ကလစ္ႏွိပ္ပါ။
- Uninstall ဆိုၿပီးေပၚလာပါမယ္။A ဲဒီထဲမွာ ကိုယ္ uninstall လုပ္စU္တုန္းက Aေၾကာင္း Aမ်ိဳးမ်ိဳး ေၾကာင့္
မပ်က္ခ့တဲ ့ဲ ေဆာ့ဖ္၀ဲ Aၾကြင္းAက်န္န႔ဲ AစAန ေတြကို ရွင္းလင္း ထုတ္ပါ။
- Restart ျပန္လုပ္ပါ။


(၃၆) Mouse ကို ေခ်ာေမြ ႔စြာ ကုိင္တြယ္ႏိုင္ပါတယ္။
မ်ားေသာAားျဖင့္ Mouse ရဲ့ default ဆက္တင္ဟာ ျပဳျပင္စရာ မလိုေAာင္ ေကာင္းပါတယ္။ တကယ္လို႔
စိတ္ႀကိဳက္ ျပင္ဆင္ ခ်င္ေသးတယ္ ဆိုရင္–
- Control Panel > System
- Hardware ကို ေရြးခ်ယ္ပါ။
- Device Manager ကို ကလစ္ႏွိပ္ပါ။
- ‘Mice and other pointing serices ဆိုတာ ရွိပါတယ္။ Aဲဒီမွာ mouse ကုိ right click ႏွိပ္ၿပီး properties
ကို စိတ္ႀကိဳက္ ေျပာင္းလဲ ႏိုင္ပါတယ္။


(၃၇) Restore point ကို ဖ်က္ပစ္ပါ။
ကနြ ္ပ်ဴတာရ့ ဲ စနစ္မုွာ တစ္ခုခု AမွားAယြင္း ျဖစ္ေနခဲ့ရင္ AရငA္ တိုင္း AေျခAေန ေကာင္းေလးကို ျပန္လည္
ရရွိေစႏိုင္ဖို႔ System Restore ဆိုတာ ထားရွိပါတယ္။ Memory ကုိေရာ၊ Hard disk ေနရာလြတ္
မ်ားမ်ားကိုေရာ လိုခ်င္တယ္ ဆိုရငA္ ရင္ restore point Aေဟာင္းေတကြ ို ဖ်က္ပစ္ရပါမယ္။
- Start > All Programs > Accessories > System tools > Disk Clean up > More Options A ထိ
ဆက္တိုက္ သြားပါ။
- A ဲဒီ More Options မွာရွိတဲ့ restore point A ေဟာင္းေတြကို delete လုပ္ပစ္ေပးပါ။


(၃၈) တစ္ပတ္တစ္ခါ defragment လုပ္ပါ။
- Start > All Programs > Accessories > System tools >Disk Defragmenter ကုိ ေရြးခ်ယ္ပါ။
- Analyzing လုပ္တာနဲ႔ Defragment လုပ္တာ ႏွစ္မ်ိဳး ရွိပါတယ္။ နာရီ၀က္၊ တစ္နာရီေလာက္ Aခ်ိန္
ေပးရပါမယ္။ ဒီ tool ဟာ window နဲ႔ ‘built-in’ tool ျဖစ္ၿပီး System မွာရွိတဲ့ မလုိAပ္တဲ့ ဖိုင္ေတြနဲ႔ Aမႈိုက္
AစAန ေတြကို Aထိုက္Aေလွ်ာက္ ဖယ္ရွား ေပးတဲ့Aတြက္ သံုးစြဲ သင့္ပါတယ္။


(၃၉) ‘Virtual memory’ တည္ေဆာက္ျခင္းဟာလည္း စနစ္ကို ျမန္ဆန္ေစပါတယ္။
ပီစီရ့ ဲ လိုAပ္တ့ဲ ပရိုဂရမ္ေတြကို ျမန္ျမန္ဆန္ဆန္ သုံးစြဲႏိုင္ေစဖို႔ ‘Virtual memory’ တည္ေဆာက္ ႏိုင္ပါတယ္။
- My Computer ကုိ Right Click ႏွိပ္ၿပီး properties ကို ေရြးခ်ယ္ပါ။
- က်လာတ့ ဲ box ထဲမွာ Advanced ကို ထပ္မံ ေရြေပးပါ။
- ‘Performance’ မွာရွိတဲ့ ‘Settings’ ကုိေရြးခ်ယ္ပါ။
- Change icon ကုိ ကလစ္ႏွိပ္ပါ။
- ၿပီးရင္ “customize” box ကုိ ‘on’ ၿပီးတဲ့ Aခါမွာ C.D.E ရွိတဲ့ drive တစ္ခုခ်င္း စီကို လိုသေလာက္ virtual
memory ထပ္မံ တိုးျဖည့္ေပးထားလို႔ ရပါတယ္။ ၿပီးရင္ set command ကုိ ကလစ္ႏွိပ္ၿပီး OK နဲ႔ ထြက္ပါ။


(၄၀) ျမန္ျမန္ဆန္ဆန္ Lock လုပ္နည္း
‘Ctrl + Alt + Del’ ကုိ တြဲဖက္ႏိွပ္ရင္ ‘Task Manger’ ေပၚလာပါလိမ့္မယ္။ AဲဒီAထဲကမွ “Log-Off” ကို
ေရြးခ်ယ္ၿပီး Aျမန္ Lock လုပ္ႏိုင္ပါတယ္။
Aဲဒီထက္ ေကာင္းတဲ့ နည္းကေတာ့-
- Kkeyboard က windows Logo Key ေလးကို ဖိထားပါ။ ‘L’ ကုိ ႏွိပ္ပါ။
- Shutdown icon ကုိ ေတြ႔ရမွာ ျဖစ္သလို လိုAပ္သလို ျပန္လည္ ၀င္ေရာက္ႏိုင္တဲ့ Log-on buttom
ကေလးလည္း ပါ၀င္ပါတယ္။
ၿမန္မာအိုင္တီေလာက ဖြံ႔ၿဖိဳးတိုးတက္ေရးဖိုရမ္မွ ကူးယူေဖာ္ၿပပါသည္။

Taskbar ကနာရီနားမွာ စာထည္႔မယ္

TaskBar ရွိ နာရီ အနားမွ AM Symbol ႏွင္႔ PM Symbol အား ၾကိဳက္ႏွစ္သက္ေသာ စာသားမ်ား ေၿပာင္းလဲေရးသားႏိုင္ပါသည္။
စာလံုးအေရအတြက္ ၁၂လံုးေရးသားႏိုင္ပါသည္။

Start>Run>intl.cpl ဟုရိုက္ပါ။Enter ကိုႏွိပ္ပါ။
Religional and Language Options Boxကိုေတြ႔ရွိရမည္ ၿဖစ္သည္။


Customize ကို clickပါ။
Customizes Regional Options Box တြင္ Time Tab ကို Click ပါ။
AM Symbol ႏွင္႔ PM Symbol ေနရာတြင္ မိမိၾကိဳက္ႏွစ္သက္ေသာ စာသား ကို ရိုက္ထည္႔ပါ။
Apply>Okေပးပါ။